RasPI 3 Wifi External Antenna Mod
After reading all the excitment over that past couple years about using the RaspberryPI as a transmitter I finally broke down and bought one. I now have the RasPI 3 with the onboard WiFi and a faster processor over the previous models. While researching different projects to try with the RasPi I came across a nice and cheap metal enclosure with a fan. Cost was around $14, much cheaper than any other metal enclosure I've found.
After putting the PI in the box and watching the fan spin for a few minutes I slapped my forehead in disgust over not thinking about the WiFi signal. Metal is a notorious blocker of RF, of course, so I now had three choices. Remove the RasPI3 from the case and add it to the pile, use an external WiFi dongle (taking up precious usb elbow room), or modding the PI for an external WiFi antenna.
I decided adding a chassis mount RP-SMA connector to the case and running a pigtail to the board would be the hackiest and coolest looking way forward. The only problem now was how to go about it in a way where I retained the best signal strength both in and out.
I did a little googling to see what other have done and came across a post from wardr's blog at dorkbotpdx.org where he (I assume) has a nice tutorial on how to go about the process in a couple different ways. Lots of nice pictures (better than my old Galaxy S3 will take anyway).
It turns out the RasPI 3 has an unpopulated partially exposed U.FL pad on the bottom of the PCB. I didn't think about taking pictures at the time so sorry, there are no before pictures from me but wardr has some on his blog.
A few notes. A part of this mod is not for the faint of heart. A tiny 0 Ohm resistor has to be moved about 45 degrees and resoldered. When I say tiny I mean human hair tiny. Resistor size is 0201. very very tiny. This resistor/jumper is located on the output side of the 2.4GHz filter. I'll circle it in the pic below, red dot is where it is stock, yellow dot is where you move it to. You could remove the resistor and place a solder blob on the other connection to supply signal to the U.FL connector instead, but you may lose a couple dBs of signal by not using the resistor. If you're not overly concerned then use the solder blob method. I stole the U.FL pcb mount from one of my ESP8266's modules.
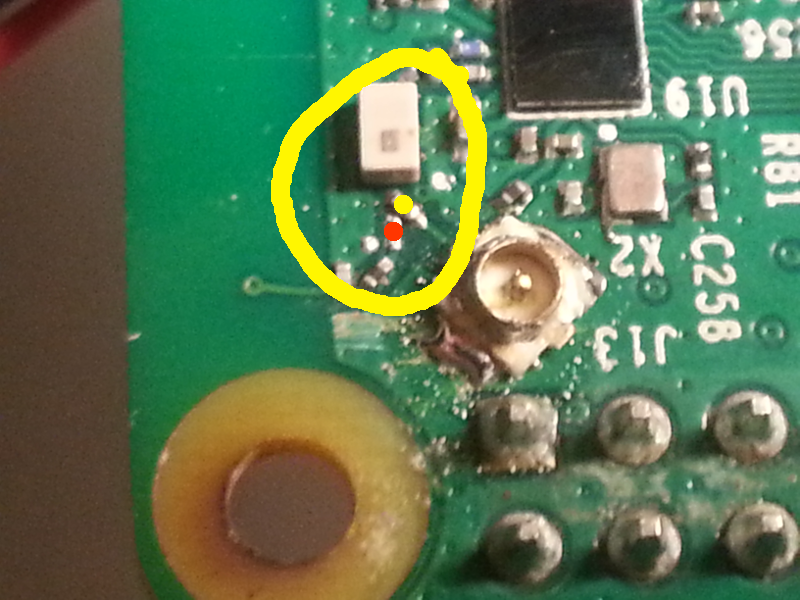
Caption: This part of the mod requires blood sacrifice to the Dark Lord. 0201 SMD parts.
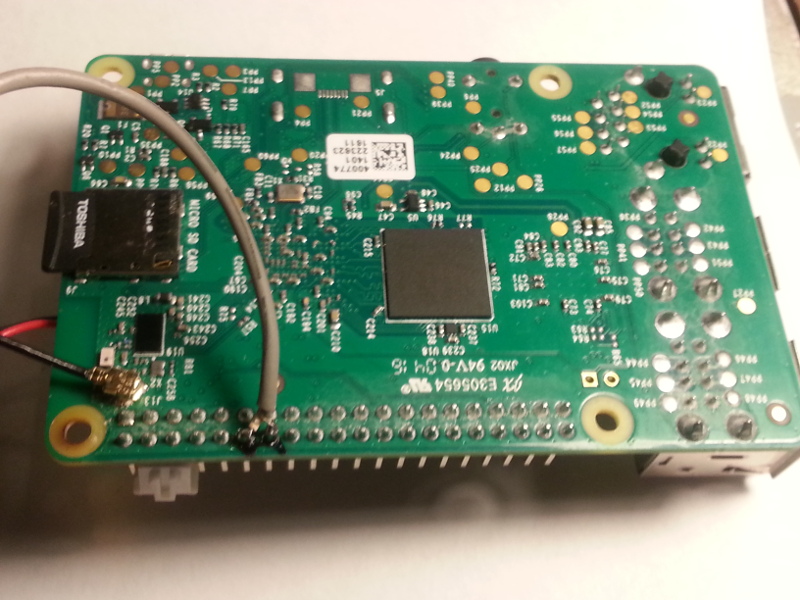
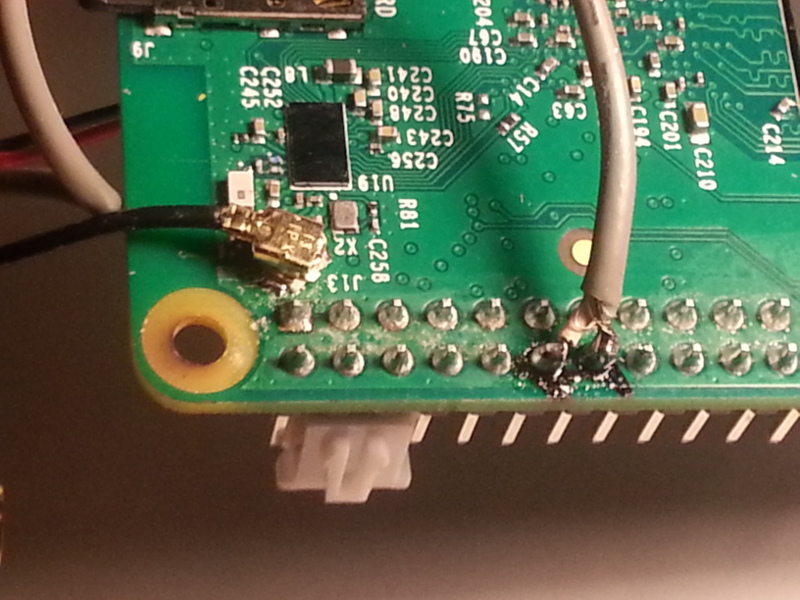
And here it is with the pigtail connected, the grey wire to the right is explained on down the page:
Turn your RasPI 2 or 3 into a Full Featured SDR Transciever Mod:
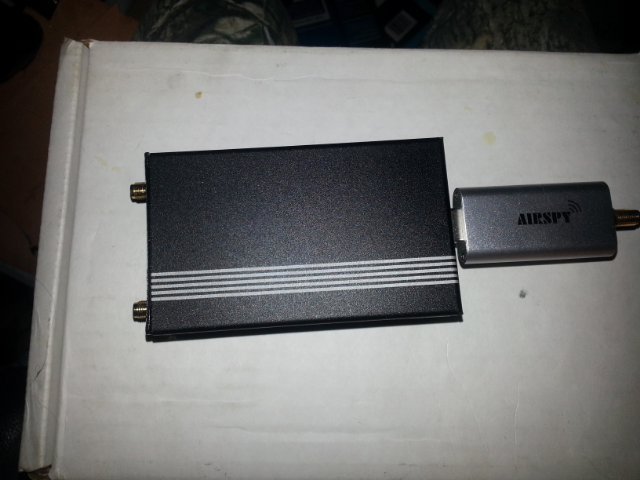
I decided while I was adding an RP-SMA connector for WiFi I might as well add on a normal SMA chassis mount connector for the PITX and similar TX application use. Doing this you can turn the RasPI 3 into a complete SDR transciever when used with an RTLSDR, Nongles.com N3 SDR, AirSpy Mini, or other USB enabled receiver. If you consider the low cost of a enhanced RTLSDR type devices, a RasPI 2 or 3, and a handful of parts to make a Low Pass / Band Pass filter, you can have a complete SDR transciever capable of RX/TX across HF, VHF, UHF, and beyond with a little dark magic and persistence. All for under $50-$75 USD.
This part is just soldering some tiny coax I repurposed out of an old VHF all mode transciever that has gone on to its reward. Center conductor to physical pin 12 of the GPIO and shield to a ground pin. Feeding it to a regular female chassis mount SMA connector. Once you've completed this you'll be able to easily swap out filters and amplifiers for the appropriate bands of operation in a flash without jacking around with the GPIO pins all the time, AND it also frees up the top side of the pins for any hat's your PI likes to wear. For example, a flashy LCD touch display to impress the ladies when cruising the ham shack.
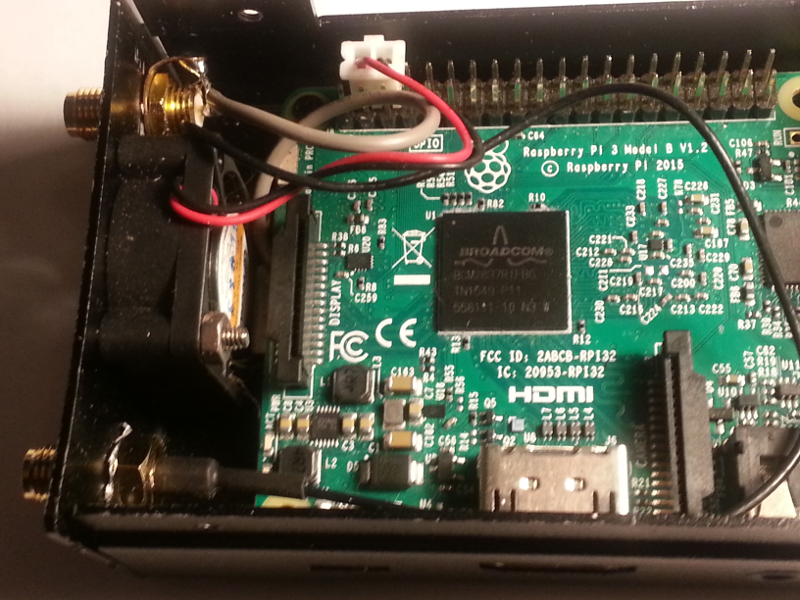
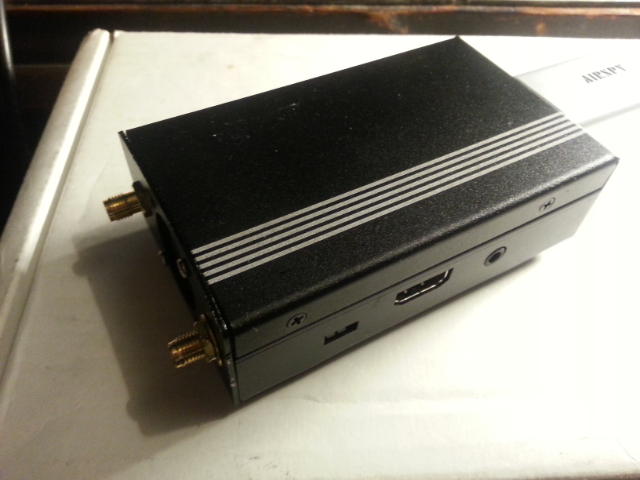
And, all together and ready for mischief:
And maybe an antenna for some long range mischief on WiFi?
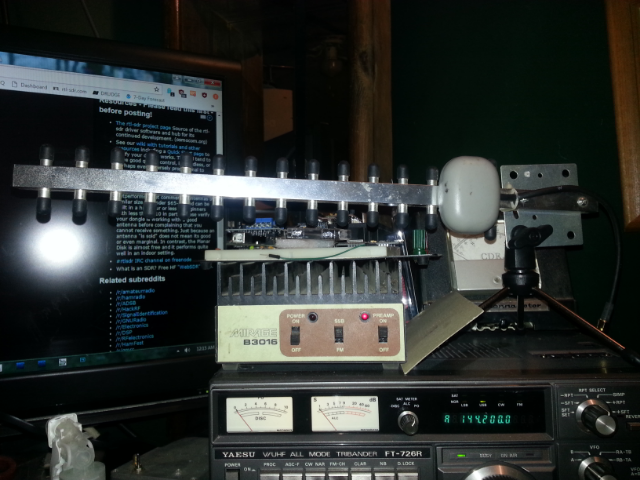
Here's a post on RTL-SDR.com's site with links to software and code to get your started TXing with a PI. Including DATV! http://www.rtl-sdr.com/transmitting-fm-am-ssb-sstv-and-fsq-with-just-a-raspberry-pi/
Remember to use proper filtering when transmitting with a RasPi. These things will put out harmonics as far as the spectrum analyzer and FCC can see if you don't properly filter.
In a follow up post I'll install and play around with some of the different code available for RX/TX use. And in yet another post show how you can use the built in WiFi with some modified drivers to do some pen testing and other security research related tasks.
Have fun and 73.
can you show us your filtering arrangement?
As soon as I get some free time I’ll snap a few pics. I have some PCB transfer for making band pass and low pass filters elsewhere on the site to get you started. The notch filter transfer can be used for anything really. I may offer some different types on my new site once I get all these downconverters modified.
http://www.RXTXDX.com
http://www.kd0cq.com/2016/12/pcb-toner-transfer-files-for-bpf-and-fm-notch-filter/
Hello, what’s the ceramic block in the ring? I fell out of my record I can not find it. and I have a weak signal from wifi. Thank you for your help
.
Hello, can I contact you privately through email?